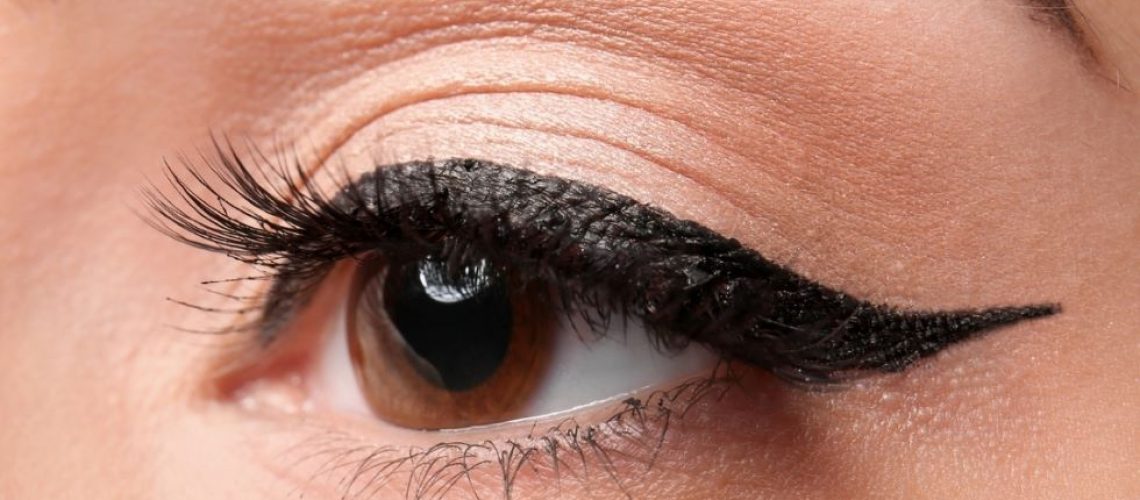
Sleek, sassy or statement-making, winged eyeliner is as versatile as it is nostalgic. From the Egyptians’ first striking kohl eyes, to Marilyn’s sultry lidded looks, to the 80’s supermodel swish – it’s a look that takes on a life of its own. A mainstay of the beauty fanatic’s repertoire, modern edge & new techniques are bringing a whole new side to this staple look. So it’s about time you learned the newest, hottest tricks to get those wing tips just right…right?
So let’s dive into how to nail the perfect winged eyeliner look. Fasten your seatbelts!
Choose your weapon wisely
Let’s be honest, a great winged eyeliner can deliver looks that kill (in a good way!). But get it wrong, and you’ll be frustratingly wiping off your whole look to try again.
So it’s best to start with your eyeliner first, and pick your weapon wisely!
Eyeliners mainly come in three main formulas – liquid, gel and pencil:
- While liquid and gel liners can offer a bolder, more striking finish, they are often messier! If you’re a bit of a beginner in this area, don’t worry. Perhaps opt for a pencil to start with for easier application.
- Pencils give a softer, dewier finish, and give you much greater control. Ideal for those wanting a subtler look, or fresh to the eyeliner party.
- Play with each formula to see what works best for you, and the length and sharpness of the wings you can achieve with each.
- This is a great opportunity to find a placement and shape that complement the shape of your eye too!
- Had a mishap? Don’t panic. Either swab a cotton bud in petroleum jelly, micellar water or carefully apply the folded edge of a makeup wipe to fix any off areas.
- To have an even better control over liquid eyeliners, place it in the refrigerator for around 15 minutes before you plan to start applying. This will harden the kohl formula a little and make for a much crisper application.
The dot method
Always struggling to get that shape right?
Try the dot method, by making an outline of the cat-eye shape first with small dots, tapping your applicator lightly. This way you can check and adjust the shape until you are happy, then fill in.
Try the tape hack
Getting that crisp, clean line is where this look can really take off!
No matter how much you practice, you may need a little helping hand. So try this super popular hack, applying a small strip of tape to the side of your eye, in an upward angle that suits your shaping (or your desired level of drama!)
Then, trace along your lash line, finishing by following the edge of the tape to create a perfectly edged wing. Once the liner has dried, slowly remove the tape to reveal a wing that’s razor sharp and sure to draw compliments.
Use an angled eyeliner brush
Want more of a cat’s eye approach?
For the perfectly chunky, thicker wingtip, think classic Adele or Twiggy, an angled brush and pot is a great way to go.
Dip the angle brush in your eyeliner pot and place it on the outer edge of your eye creating an angle that aligns with your temples. Then invert the brush slightly to create the other edge. Now, fill in the blank space carefully between the lines carefully, before sweeping a graduating line across the upper lids. Voila!
Lighten up
Meet the cat eye’s modern cousin – the kitten.
The kitten eye is booming right now, thanks to its ability to work on every style and shape in a hella-flattering way. It’s a subtler, daintier version of the classic thick wing tip, plus it’s easier to execute too – perfect for urban girls on the go. Think more Lulu Stone than Sofia Loren.
The perfect compliment to minimal makeup and glowing skin, with a focus on lifting the facial structure and embracing natural beauty.
The main difference is to start the liner from the center of the eye, instead of starting right at the inner corner. Then, using short, thinner strokes, draw along the lash line, adding a tiny flick at the end.
If your liquid liner is too intense for this look, try using a black or coloured eyeshadow and flat liner brush instead. Or go for the smoky, smudgy, rocker version, and pencil onto your lash line before blending up and out with a smudger brush.
Is hair and makeup your life? Want to up your game and offer your clients incredible looks like these? Then turn your passion into an exciting profession with a makeup course. Our short beauty courses are designed to help you become the beauty boss of your dreams, ready to create Insta-worthy looks your clients can’t help but share.
Our make up artist course is run by leading industry experts with all the inside knowledge you need to succeed. You’ll be led through the fundamentals of makeup artistry, creating a solid foundation for your creativity to thrive.
Plus, with our makeup course online, you can learn entirely at your own pace, at a time that suits you & pay in affordable instalments. Plus, we offer the only online makeup course with a full kit in New Zealand! Personalised for your course needs and sent directly to your door.
With this makeup certification in your pocket and your winged liner on point, the beauty world is yours to conquer! Sign up today – we can’t wait to meet you.
